SpringBoot应用部署 - docker镜像打包,运行和管理
约 1154 字大约 4 分钟
SpringBoot应用部署 - docker镜像打包,运行和管理
随着软虚拟化docker的流行,基于docker的devops技术栈也开始流行。本文主要介绍通过docker-maven-plugin将springboot应用打包成docker镜像,通过Docker桌面化管理工具或者Idea Docker插件进行管理。@pdai
通过docker-maven-plugin构建镜像
这里使用的是最为常用的maven构建,由spofity开源,具体可以看Github - docker-maven-plugin 在新窗口打开
编写Dockerfile文件
更多Dockerfile相关的,可以看Docker官网Dockerfile配置 在新窗口打开
在项目的根目录(与pom同一层级)创建Dockerfile文件
    FROM openjdk:8-jre
    MAINTAINER pdai
    WORKDIR /
    ADD target/springboot-demo-helloworld.jar app.jar
    EXPOSE 8080
    ENTRYPOINT ["java", "-jar"]
    CMD ["app.jar"]
具体解释如下:
- FROM openjdk:8-jre,基镜像一般采用openjdk
- MAINTAINER pdai,创建镜像的作者,一般是作者邮件地址
- WORKDIR /,WORKDIR指令设置Dockerfile中的任何RUN,CMD,ENTRPOINT,COPY和ADD指令的工作目录。
- ADD target/springboot-demo-helloworld.jar app.jar,表示将jar包添加到镜像中,并重命名app.jar
- EXPOSE 8080,表示暴露的端口是8080
- ENTRYPOINT ["java", "-jar"],表示启动时运行 java -jar
- CMD ["app.jar"],表示参数,这里是运行的具体的jar
引入docker-maven-plugin
为方便你学习,我这边给每行添加了具体的注释
    <build>
        <!-- 固定的jar的名字,这样Dockerfile可以固定写 -->
        <finalName>springboot-demo-helloworld</finalName>
        <!-- 构建的插件 -->
        <plugins>
            <!-- springboot构建jar -->
            <plugin>
                <groupId>org.springframework.boot</groupId>
                <artifactId>spring-boot-maven-plugin</artifactId>
            </plugin>
            <!-- 构建docker镜像 -->
            <plugin>
                <groupId>com.spotify</groupId>
                <artifactId>docker-maven-plugin</artifactId>
                <version>1.2.2</version>
                <executions>
                    <execution>
                        <id>build-image</id>
                        <phase>package</phase>
                        <goals>
                            <goal>build</goal>
                        </goals>
                    </execution>
                </executions>
                <configuration>
                    <!-- image 的名字 -->
                    <imageName>${project.build.finalName}</imageName>
                    <!-- image 的tag, 可以是多个 -->
                    <imageTags>
                        <imageTag>latest</imageTag>
                        <imageTag>${project.version}</imageTag>
                    </imageTags>
                    <!-- Dockerfile所在的目录 -->
                    <dockerDirectory>${project.basedir}</dockerDirectory>
                    <!-- 复制jar到docker的位置 -->
                    <resources>
                        <resource>
                            <targetPath>/</targetPath>
                            <!--jar 包所在的路径,对应target目录-->
                            <directory>${project.build.directory}</directory>
                            <!-- 包含的jar -->
                            <include>${project.build.finalName}.jar</include>
                        </resource>
                    </resources>
                </configuration>
            </plugin>
        </plugins>
    </build>
构建镜像测试
执行mvn package
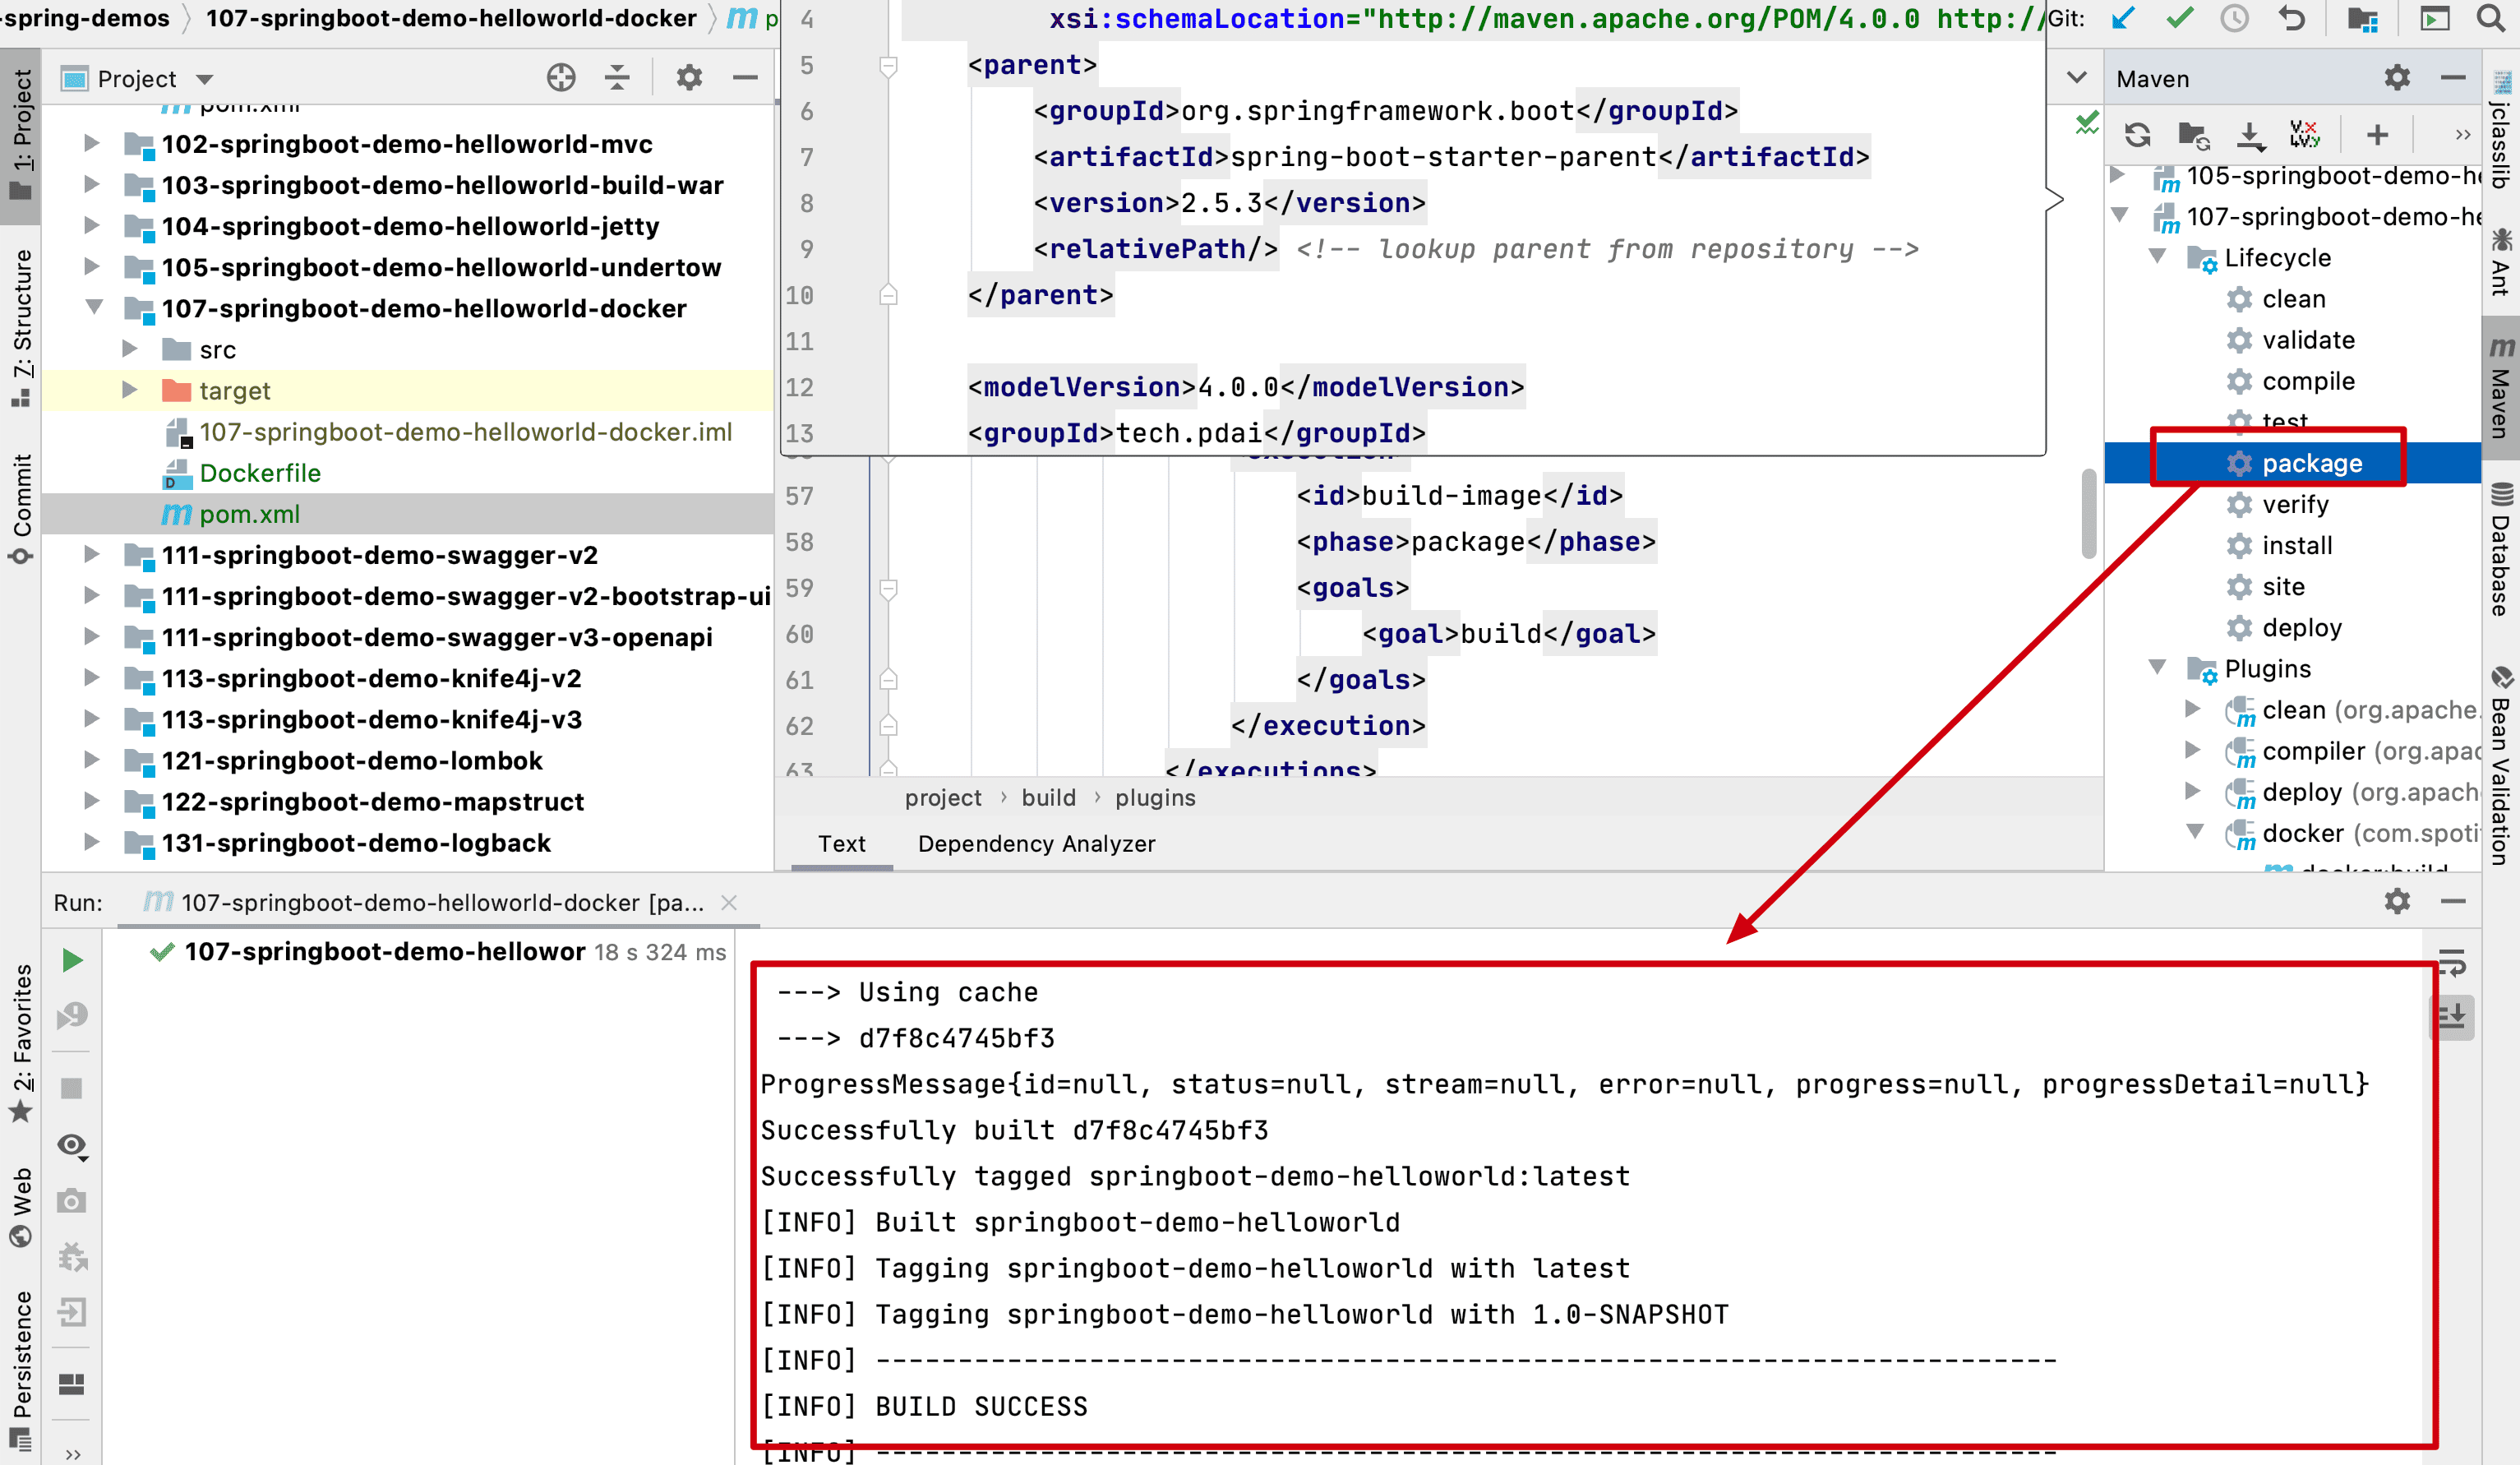 编译docker image的日志
    [INFO] Building image springboot-demo-helloworld
    Step 1/7 : FROM openjdk:8-jre

     ---> c739d22edd6e
    Step 2/7 : MAINTAINER pdai

     ---> Using cache
     ---> 06c416bae082
    Step 3/7 : WORKDIR /

     ---> Using cache
     ---> b6daef7ab3f2
    Step 4/7 : ADD target/springboot-demo-helloworld.jar app.jar

     ---> Using cache
     ---> 22201ebd2a12
    Step 5/7 : EXPOSE 8080

     ---> Using cache
     ---> 42dd45bbeeb5
    Step 6/7 : ENTRYPOINT ["java", "-jar"]

     ---> Using cache
     ---> 9725c120cda8
    Step 7/7 : CMD ["app.jar"]

     ---> Using cache
     ---> d7f8c4745bf3
    ProgressMessage{id=null, status=null, stream=null, error=null, progress=null, progressDetail=null}
    Successfully built d7f8c4745bf3
    Successfully tagged springboot-demo-helloworld:latest
    [INFO] Built springboot-demo-helloworld
    [INFO] Tagging springboot-demo-helloworld with latest
    [INFO] Tagging springboot-demo-helloworld with 1.0-SNAPSHOT
    [INFO] ------------------------------------------------------------------------
    [INFO] BUILD SUCCESS
    [INFO] ------------------------------------------------------------------------
    [INFO] Total time:  17.264 s
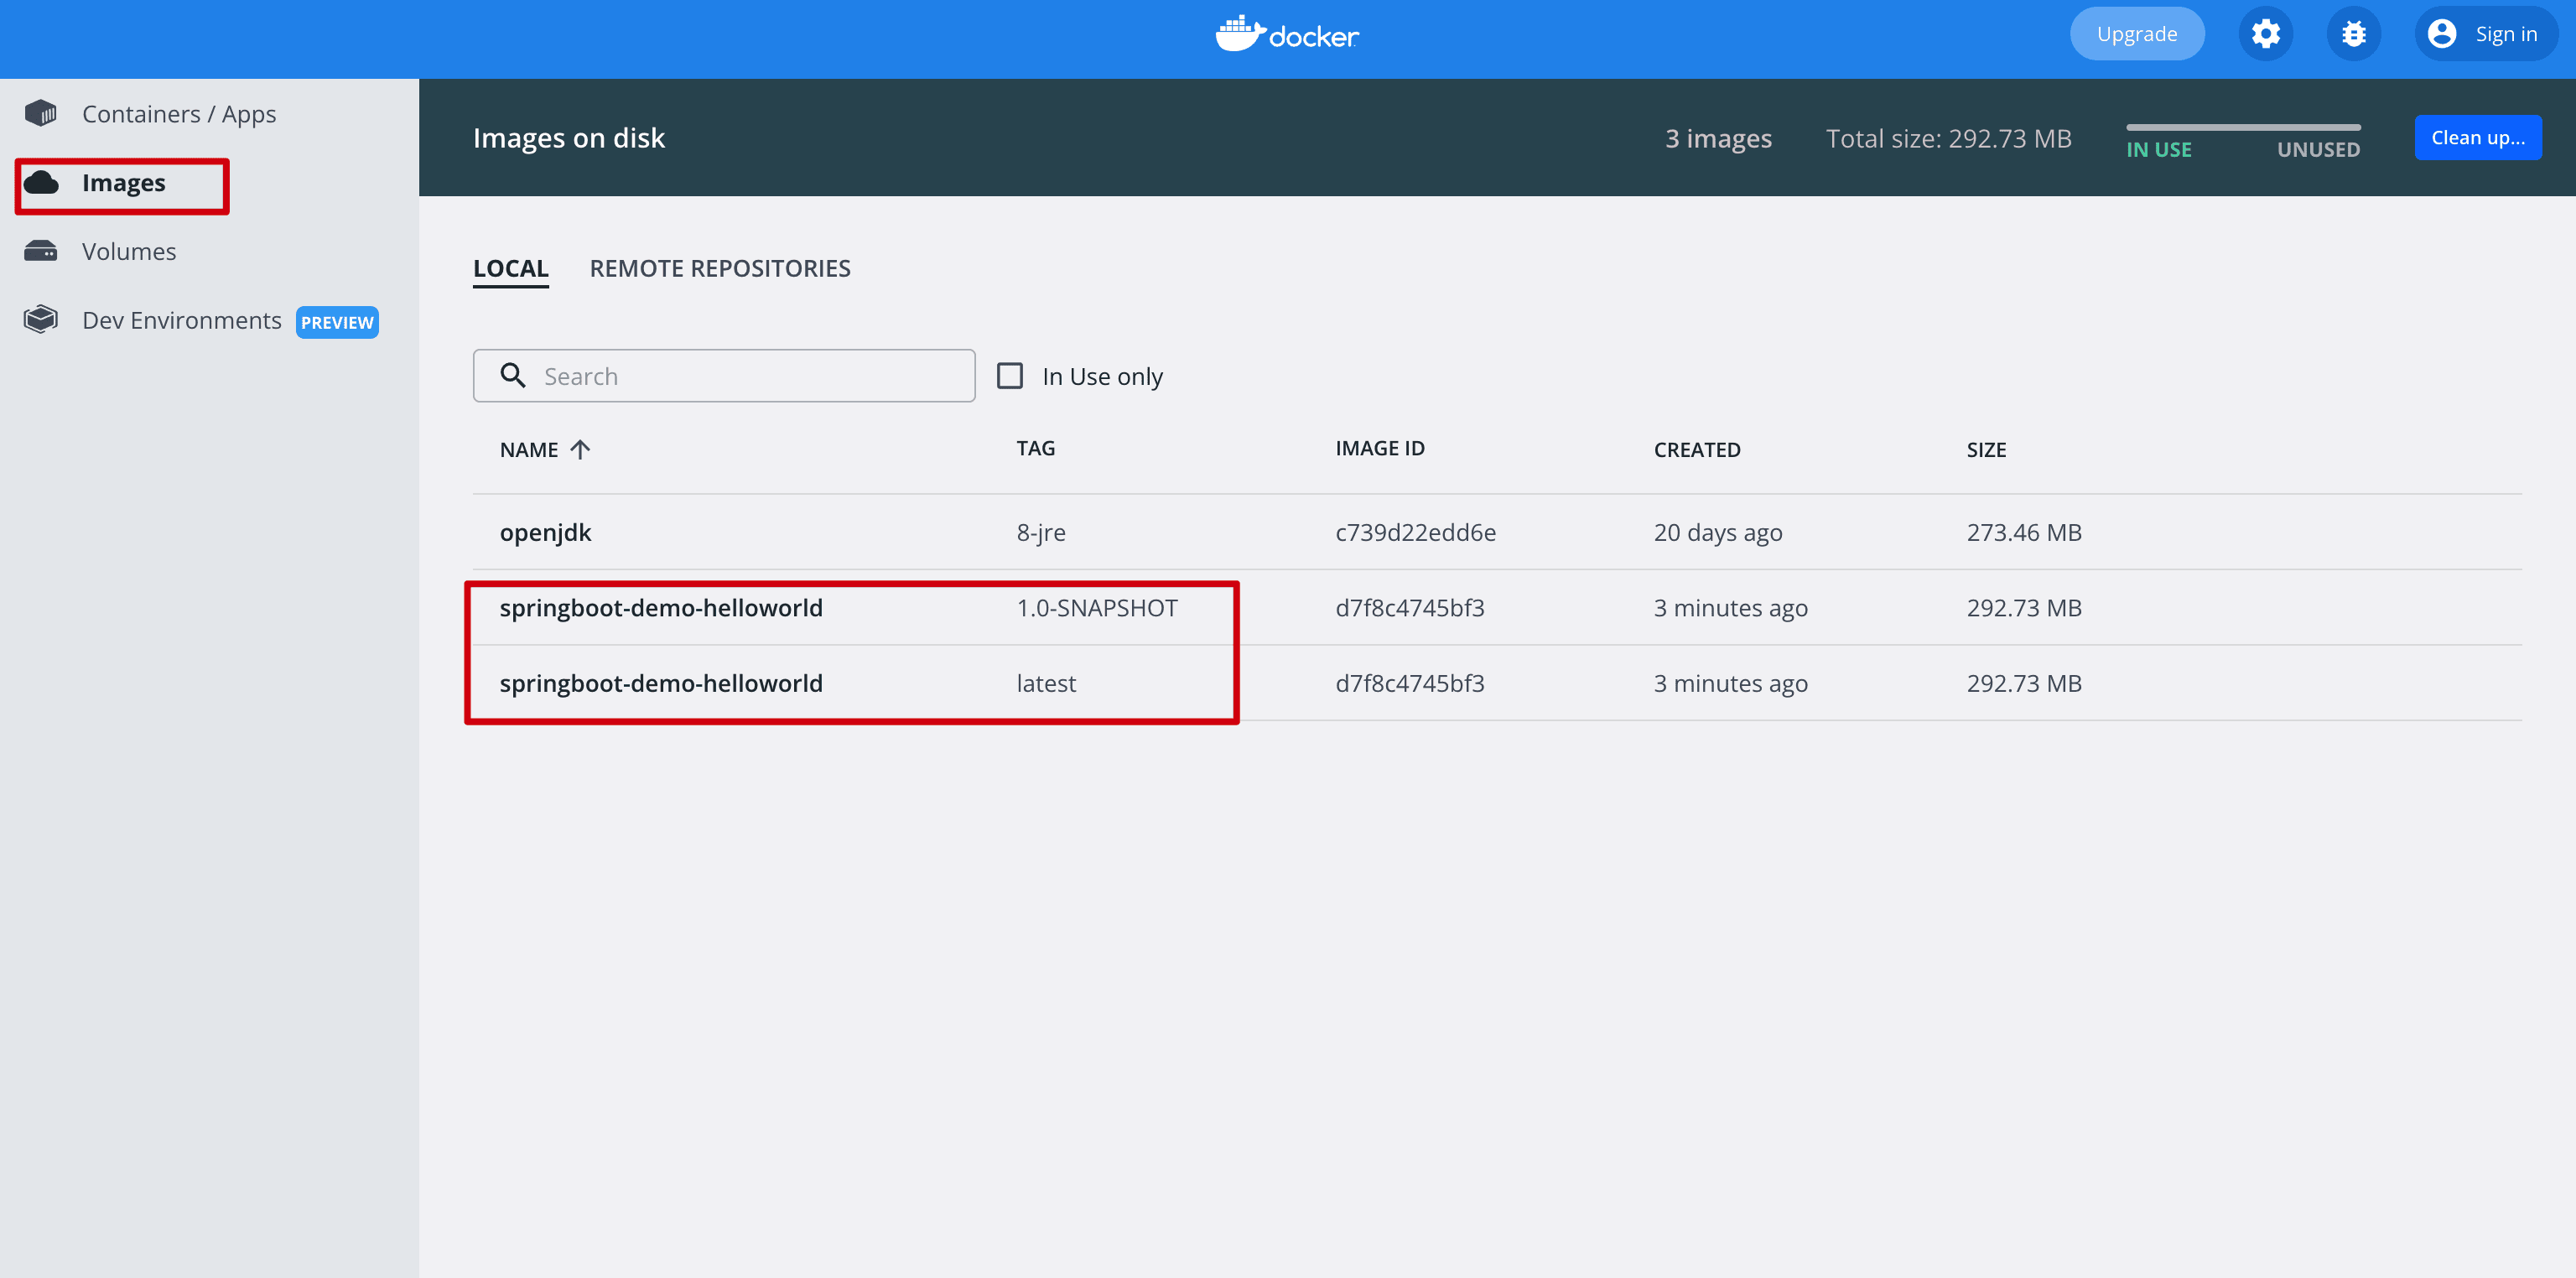
通过Docker桌面化工具管理
这里展示通过Docker 官方的管理工具管理,官网地址 在新窗口打开 。
编译完以后,默认会在本地docker中生成镜像
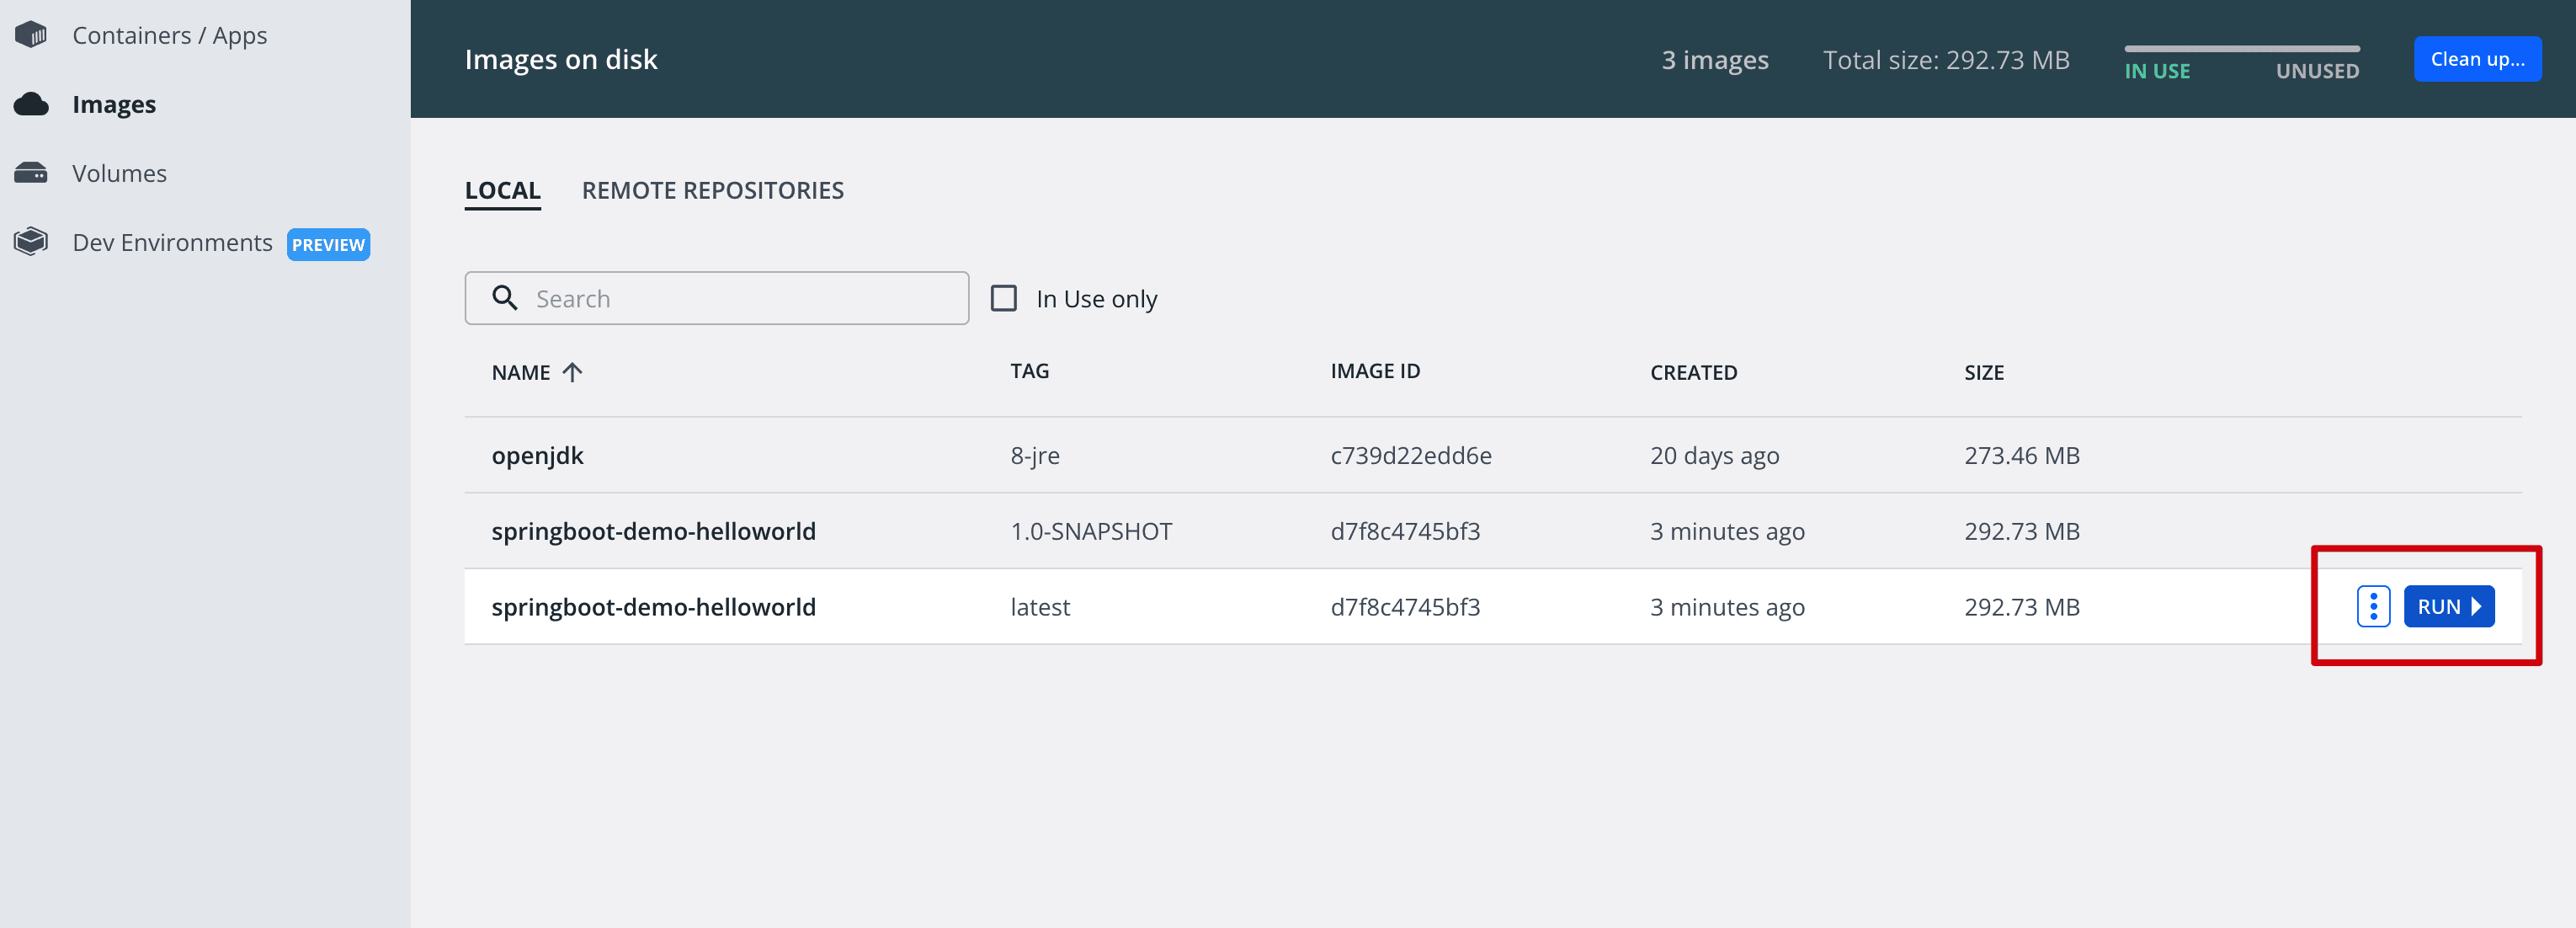
 点击Run
点击Run
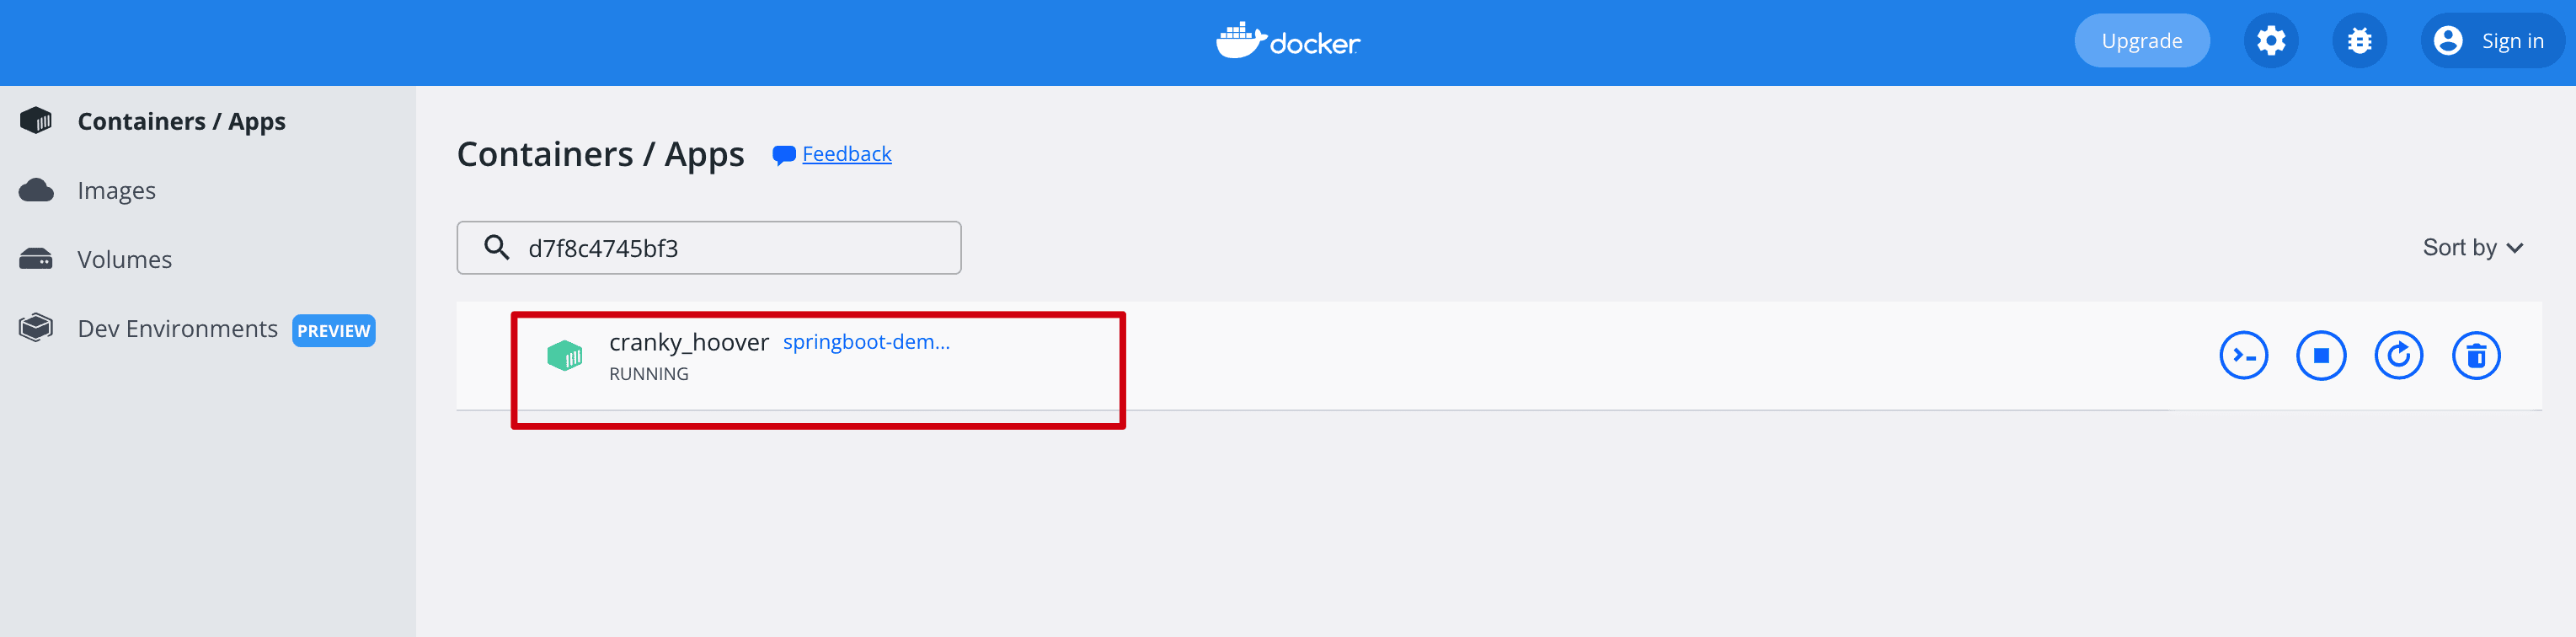
 Run后的实例
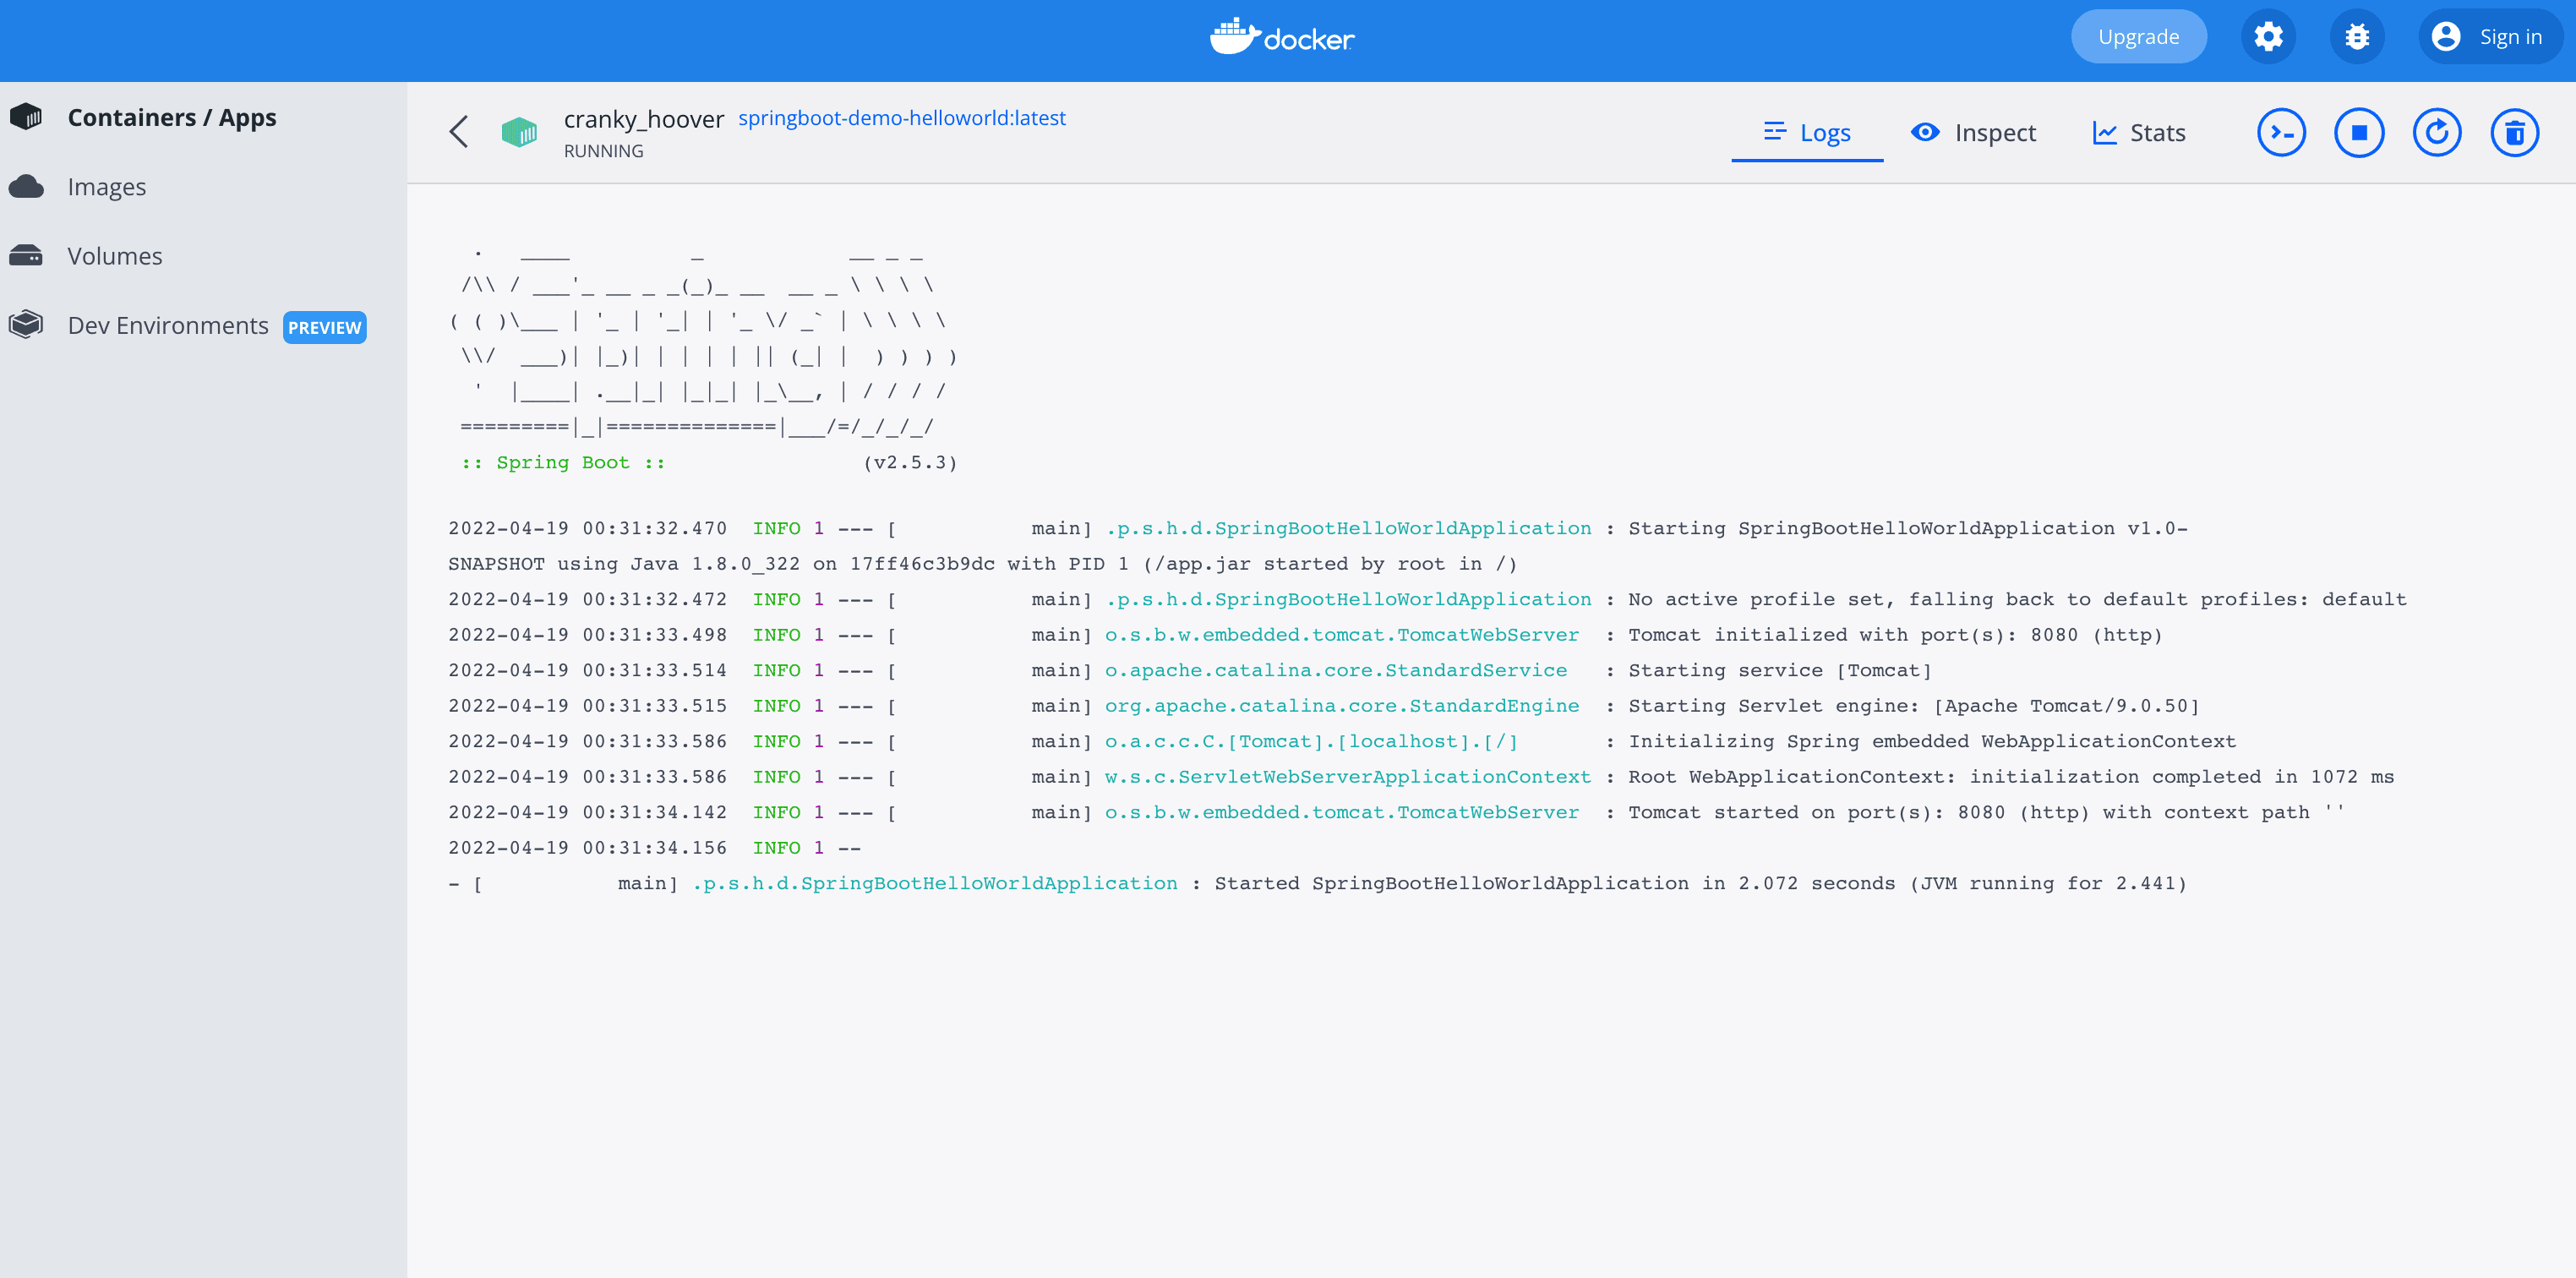
 实例的日志
实例的日志
 访问接口
访问接口

通过idea的docker插件进行管理
除了docker自带的管理工具,还可以通过idea的docker插件进行管理。
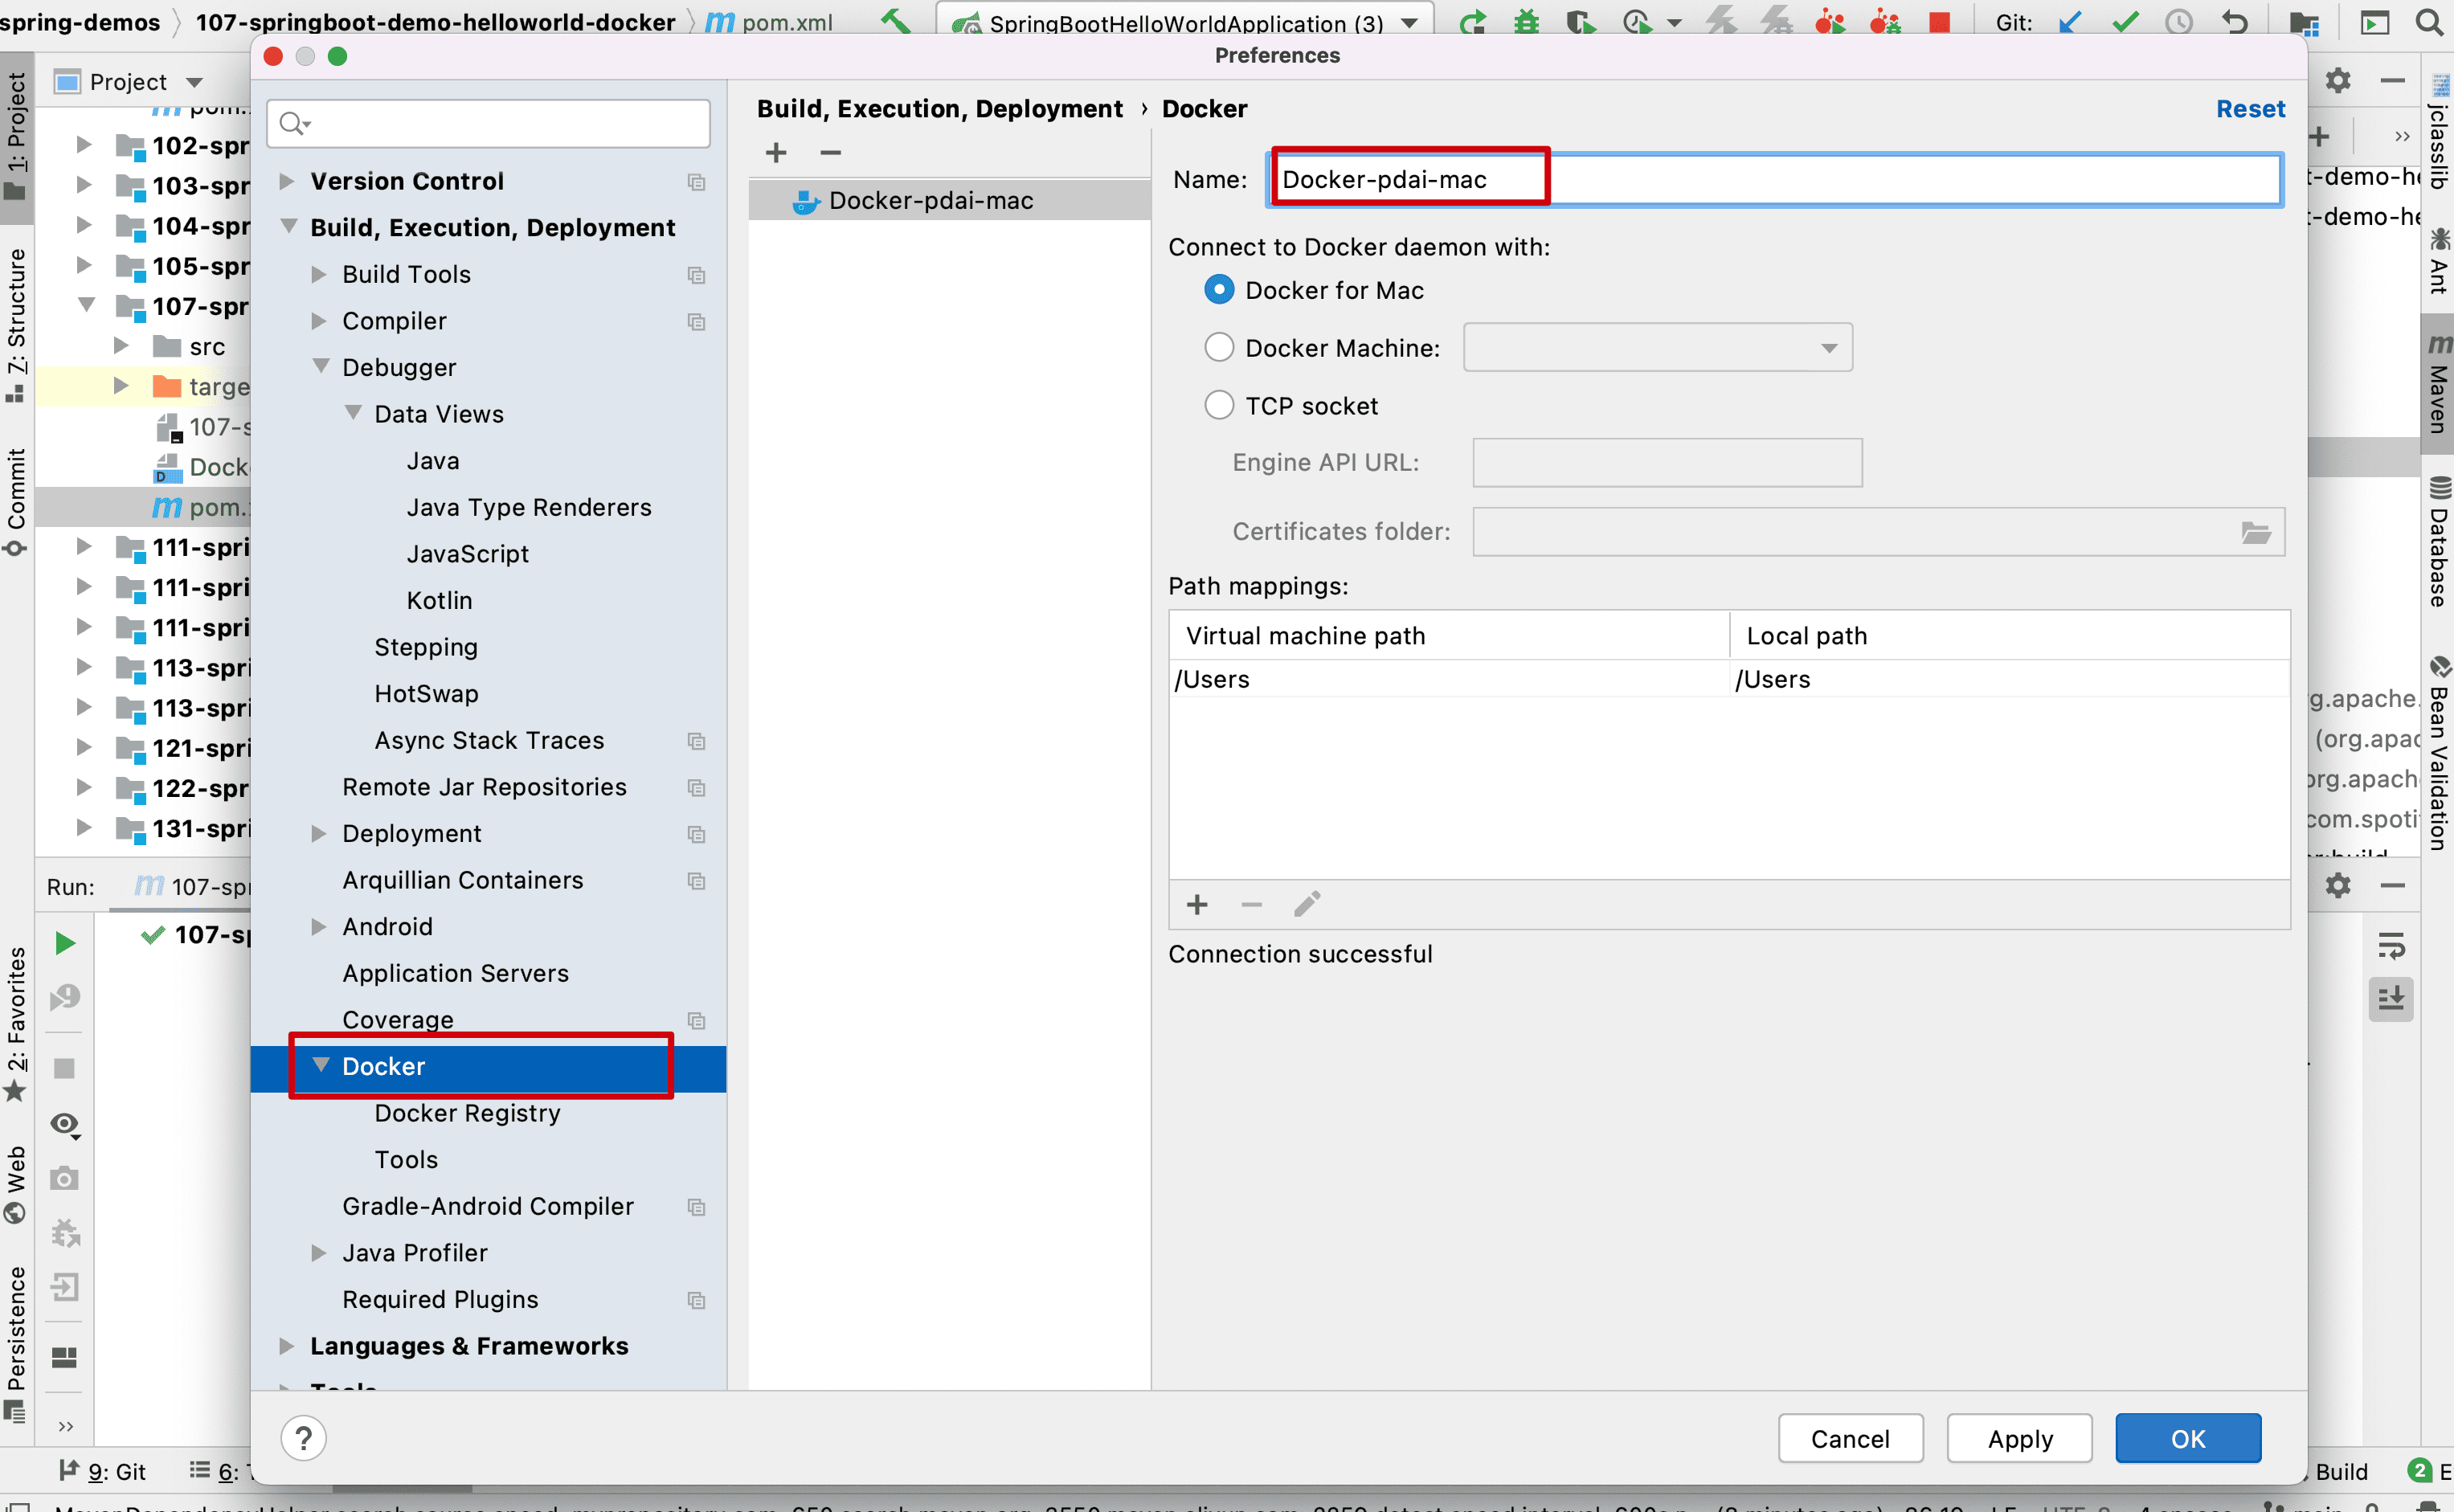
(新的版本自带docker插件,如果没有可以自行下载) 配置Docker插件
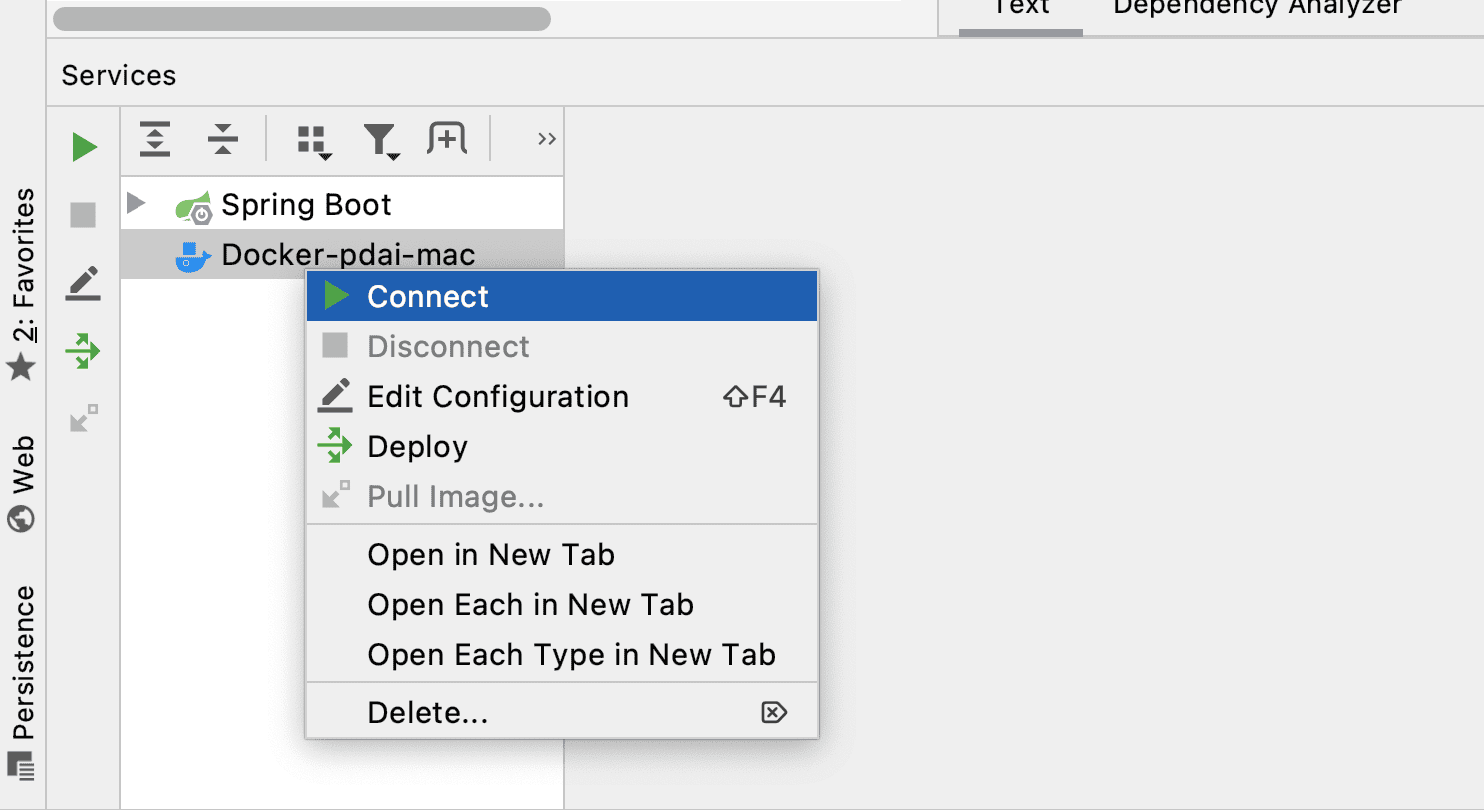
 点击连接
点击连接
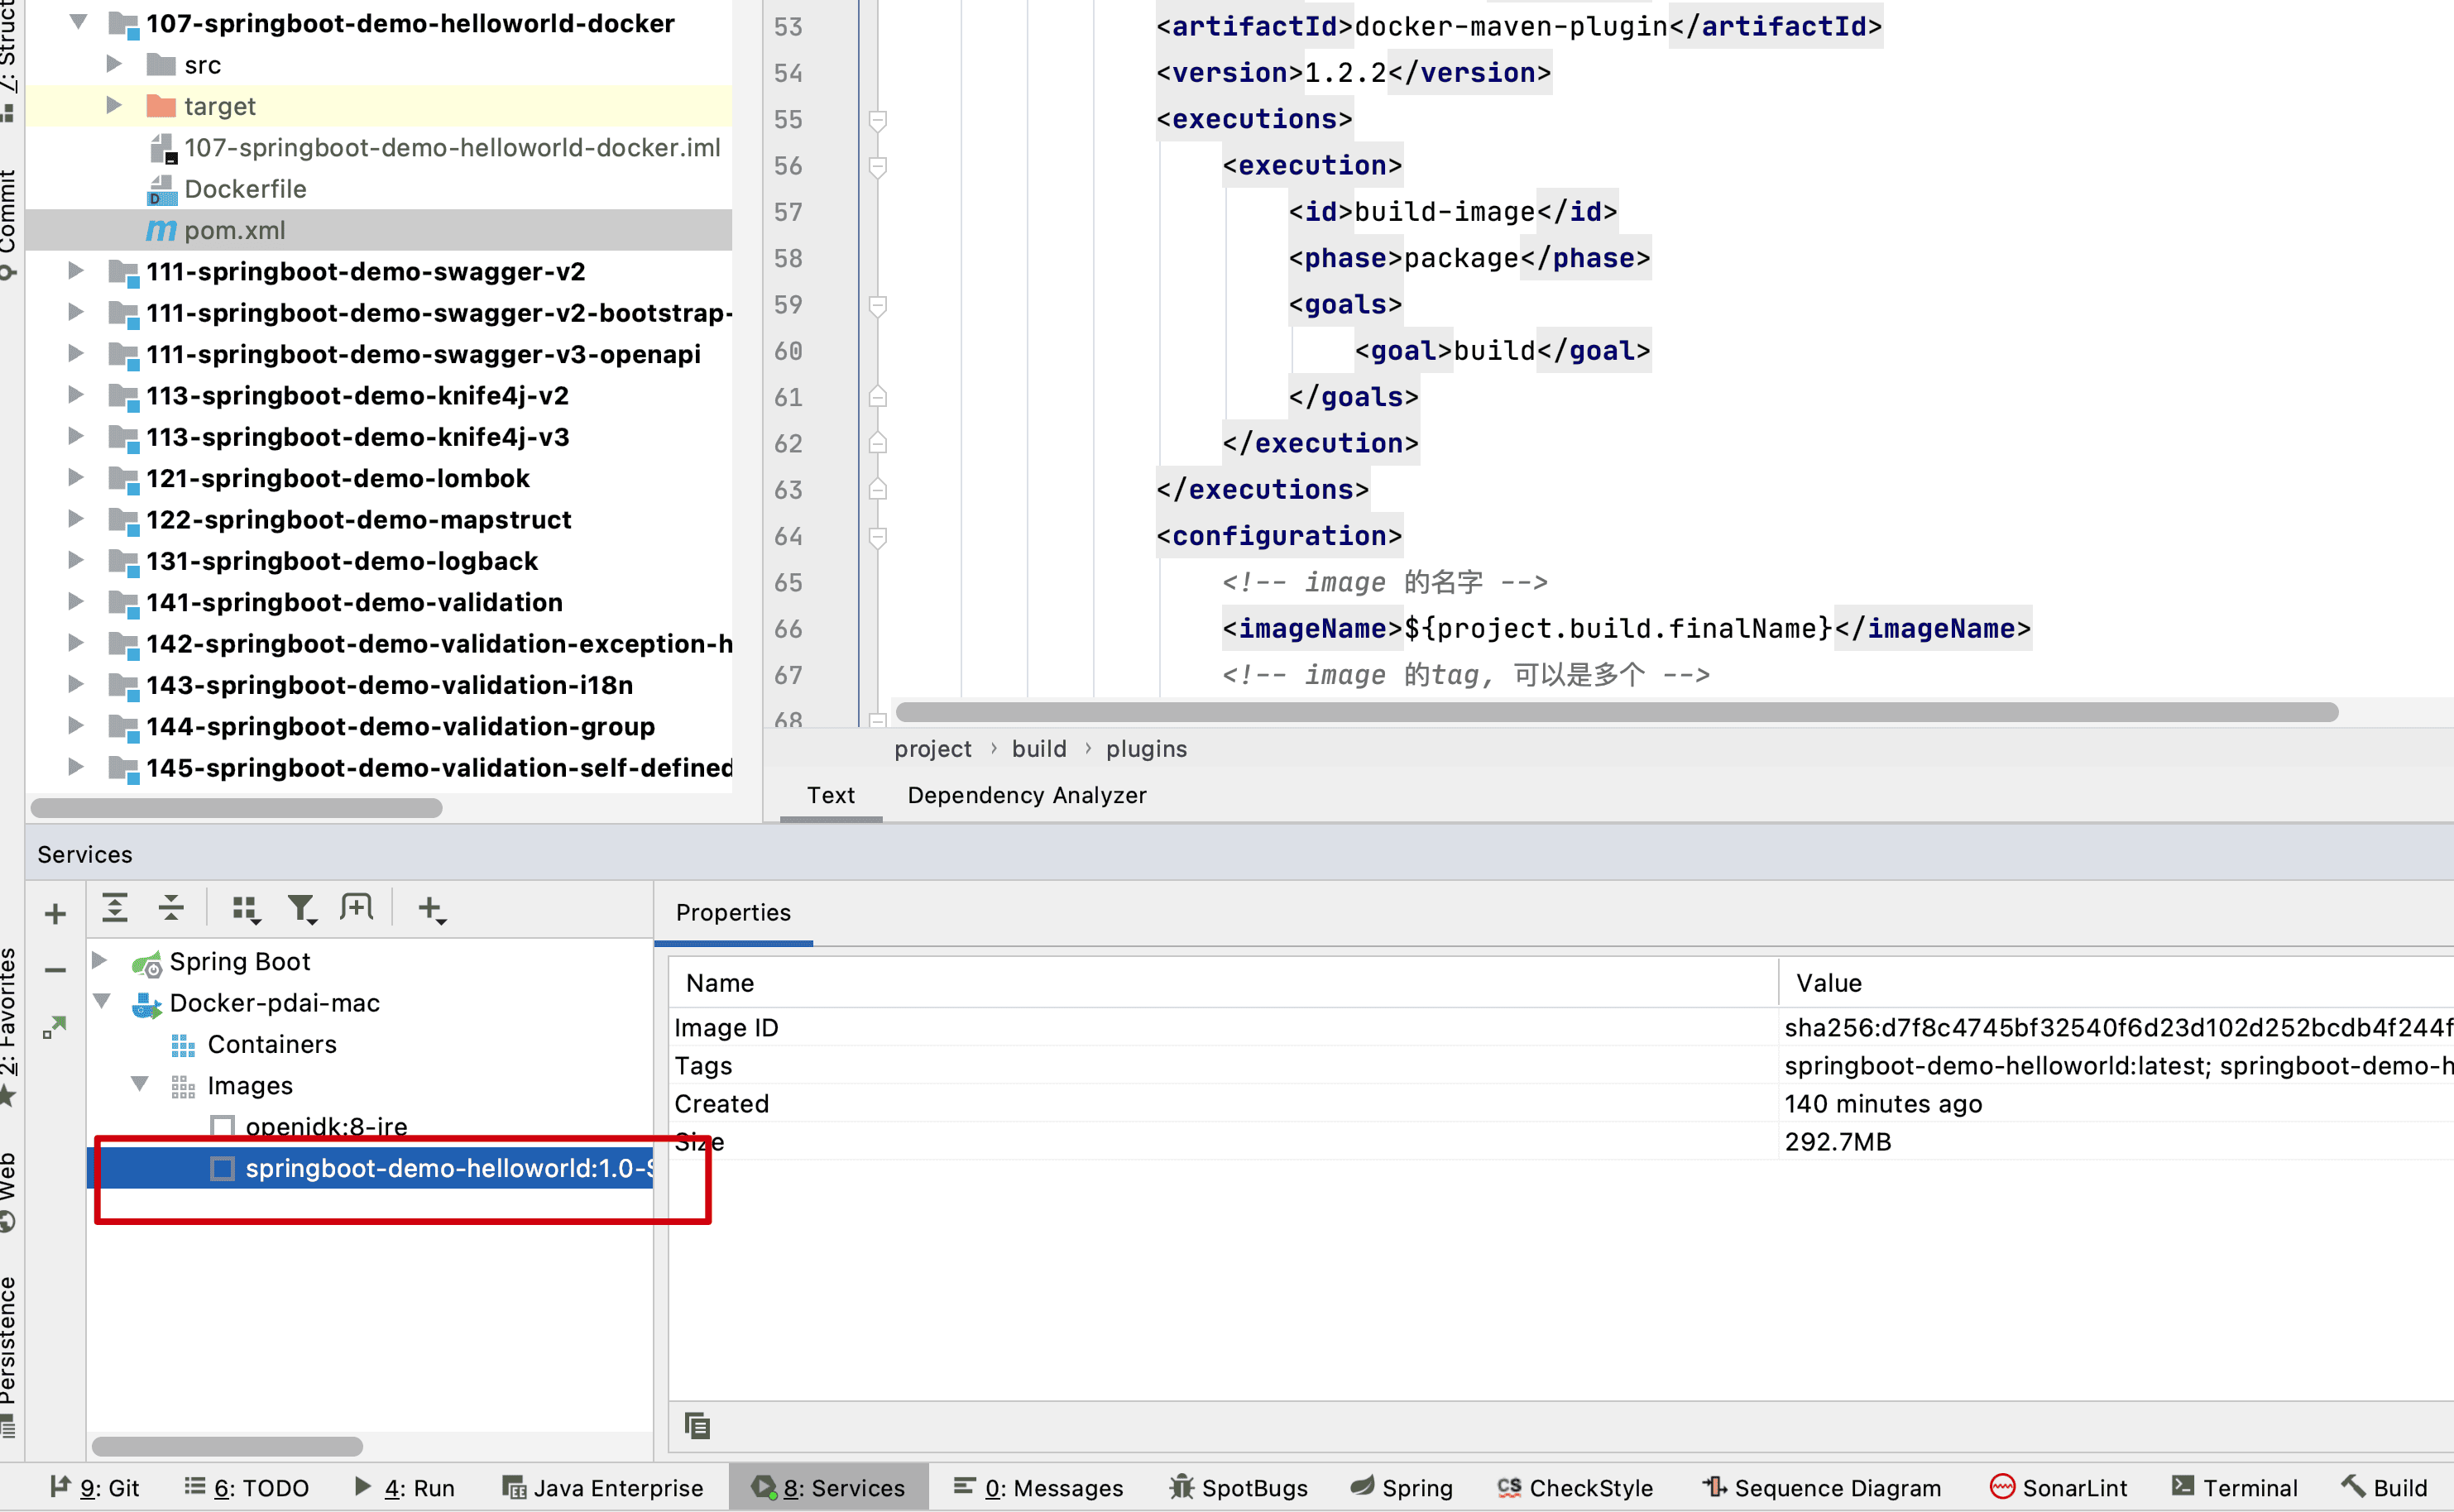
 可以看到编译后的镜像
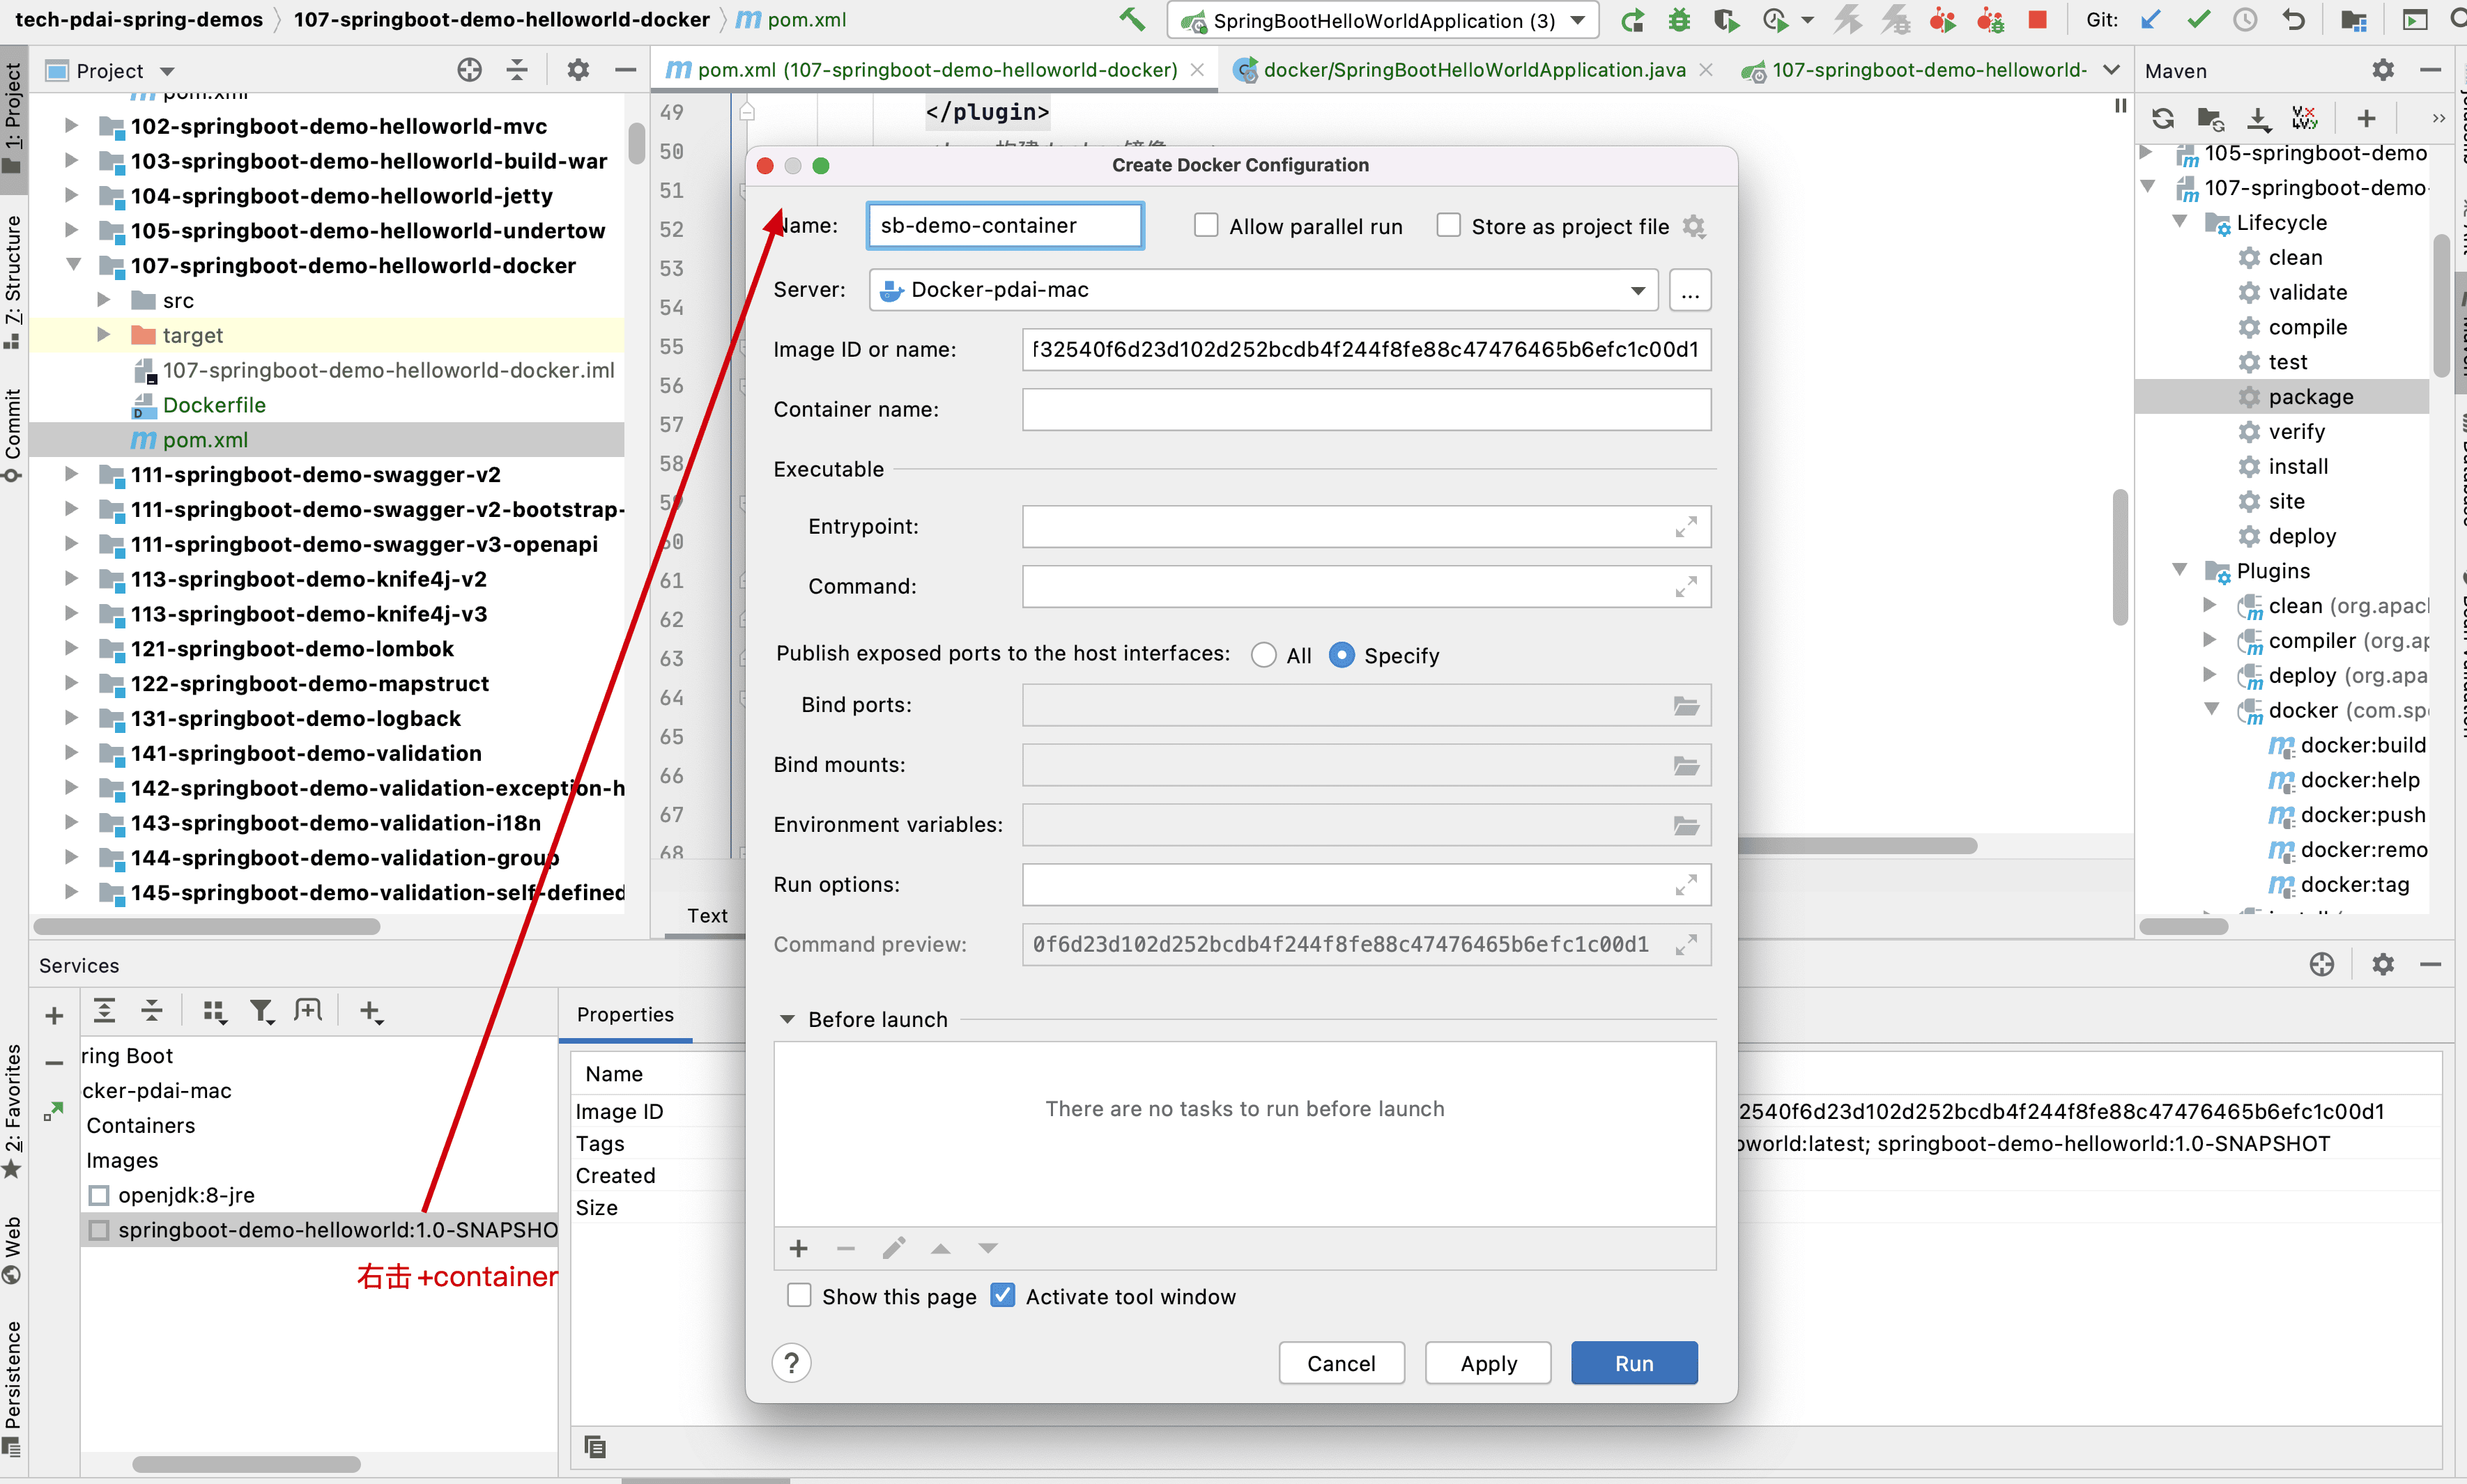
 右击,添加Container
 启动这个镜像的实例

示例源码
https://github.com/realpdai/tech-pdai-spring-demos 此外可以参考官方相关文档 https://spring.io/guides/gs/spring-boot-docker/